
Add new user
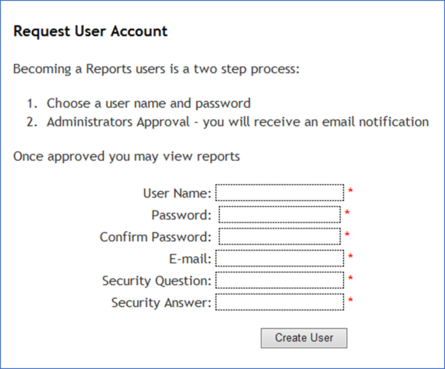
New users are created in one of two ways. They either follow the “Create New Account” link on the login page of Merlin Web, or they are manually added by an Administrator.
When a user clicks on “Create New Account”, they complete a basic information form requesting user name, password, email, and security question/answer. That information is then emailed to an Administrator account awaiting approval.
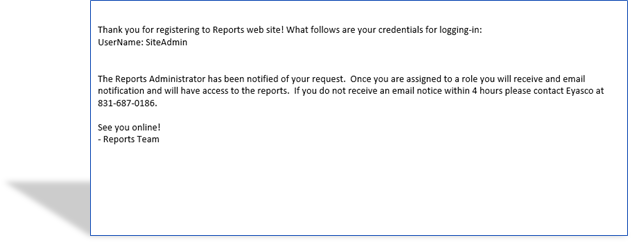
To approve a user who has registered this way, an Administrator must navigate to the Admin Interface in Merlin Web and select “Manage Users”.
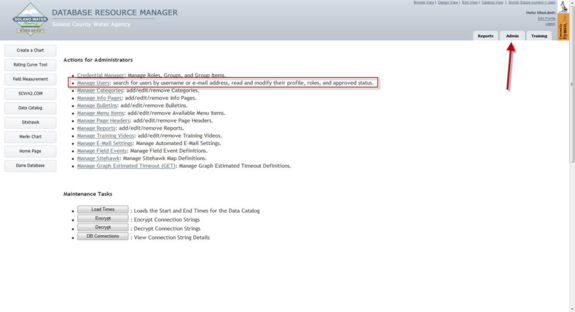
Once in the Manage Users interface, click on a letter link or use the search interface to find the newly registered user. And click on the pencil (edit) icon beside the user name.
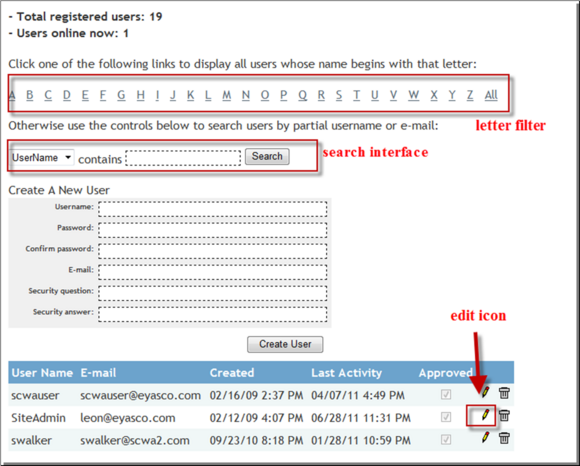
The User Detail page will now appear, with the following controls:
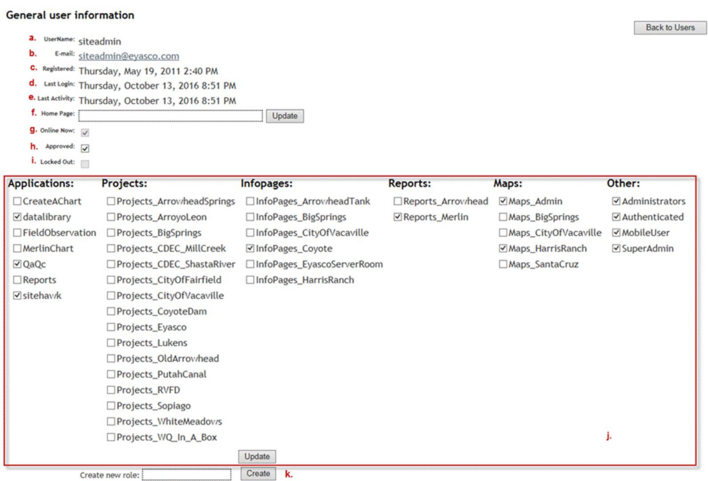
a. User Name: The name of the user being edited.
b. Email: The email of the user being edited.
c. Registered: The date the user was created.
d. Last Login: The date and time the user last logged into Merlin Enterprise or Merlin Web.
e. Last Activity: The date and time a user last navigated to a new Merlin Web page.
f. Home Page: The initial page a user sees after logging in. If no homepage is defined for a user, that user will be sent to the default web page (usually Sitehawk).
g. Online Now: This checkbox indicates if a user is currently logged into Merlin.
h. Approved: This checkbox indicates the current state of the user. If a user creates a new account using the controls on the login page, the account must be approved by an administrator before being activated.
i. Locked Out: A user will be locked out after 5 invalid login attempts, or can be locked out by an Administrator using this form. A locked out user will be unable to log into Merlin. Once a user is locked out, an administrator must use this interface to unlock the user.
j. Edit User Roles: This section lists all Roles created using the Credential Manager. A user can be assigned to multiple roles at once using this interface.
k. Create New Role: a new role can be created using this form. After a role is created, groups must be assigned to it using the Credential Manager.
To authorize a new user, select the checkbox labeled “Approved” and use the Edit User Roles tool to grant specific Roles and authorizations to the new user. Click “Update” to save the changes and click on the user’s email address to send a confirmation that his or her application has been approved.
To manually create a user, navigate to the Manage Users interface as described above and enter new user information underneath the search tool. When a user is created this way, he will not be assigned to any roles. Roles are assigned through the edit user interface or through the Credential Manager.