
Adding user roles
Roles are shown in columns below the General User Information. Select Roles by checking the box next to the name and then when you are finished click the “Update” button.
The standard role which all new users should have access to is the Authenticated role. This role will assign the menu items that all users should see on the most basic level – for example, the Authenticated role could give access to menu items such as the Help Link, and the Home Page.
After the User has been created, an administrator needs to log on to verify the account and assign permissions to it. Have the administrator account direct to the Admin tab on the top right of the screen, and then click on “Manage Users’. Find the user account that was just created based on its user name and click on the Pencil icon which leads you to edit that user.
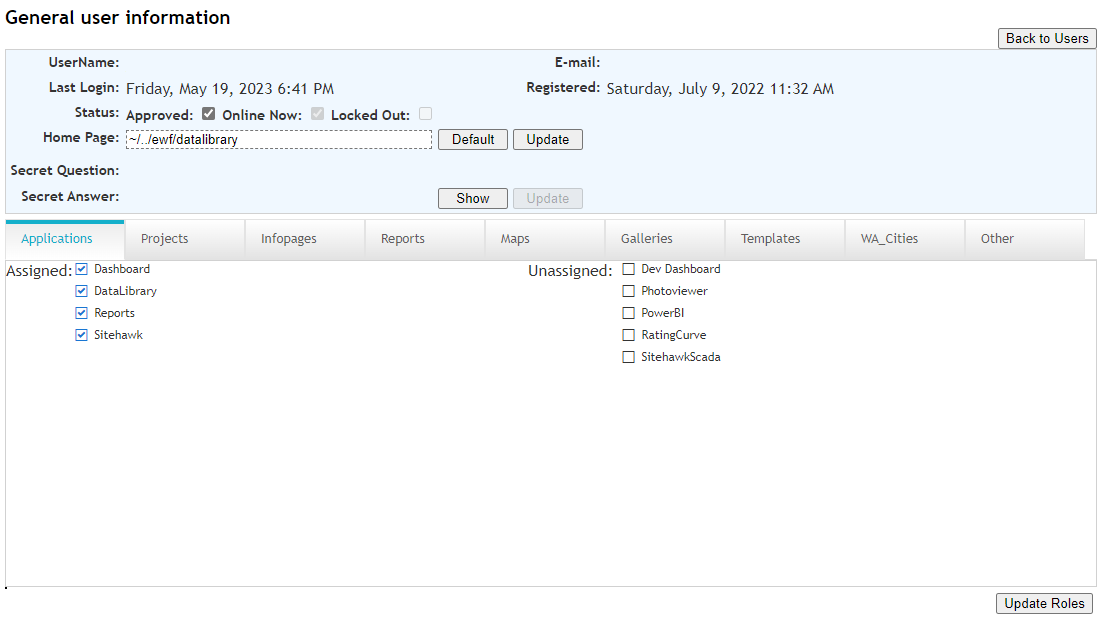
Once you have found the User that was created and opened its Edit page, make sure that the checkbox for “Approved” is checked.
On this page, we can also assign Roles to a User. Roles define certain rights that can be given to a user. In other words, this is the way to manage what users can see, and what they cannot see. Role categories are on the tabs below the General User Information and include:
-
Applications: The web tools inlcuded in MerlinWeb like SiteHawk and Data Library, etc.
-
Projects: The wentiry that owns a data parent data category
-
Infopages
-
Reports
-
Maps
-
Galleries
-
Templates
-
WA_Cities: This is a custom Water Accounting application
For example, if you wants a user to see data from a specific project when they go to any charting application , click the check box next to the project name.
Choose the appropriate Roles for the User by checking selections under Applications, Projects, Infopages, Reports, Maps and Other.