Walkthrough: Personalizing the Page
To access the personalization tools on a freshly installed website, open a web browser and type the Sitehawk address directly into a browser navigation bar , followed by the tag ?p=y (personalization=yes). This will enable the personalization menus on the anonymous page. If the web framework is installed on SERVER01, as APPLICATION02 the address will be SERVER01/APPLICATION02/Sitehawkanon.aspx?p=y

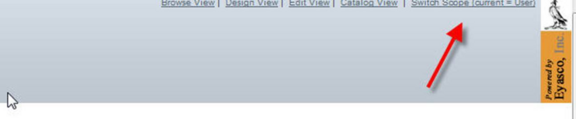
Click on the ‘Switch Scope (current=user)’ link to switch to Shared scope. In shared mode, the changes you make to the page formatting will apply to all users, while changes made in user mode will only apply to you.
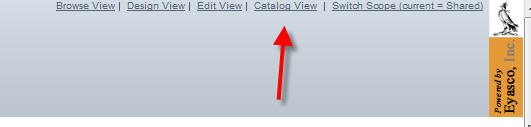
Click on the ‘Catalog View’ link to bring up the list of objects that can be inserted on a page.
The Sitehawk anon page will take two objects: The alarms grid in the Left Zone Top, and the page header in the center zone top.
Check the Map Alarm Legend checkbox, then select ‘Left Zone Top’ from the drop-down menu. Finally, click the Add button to lock in your change.
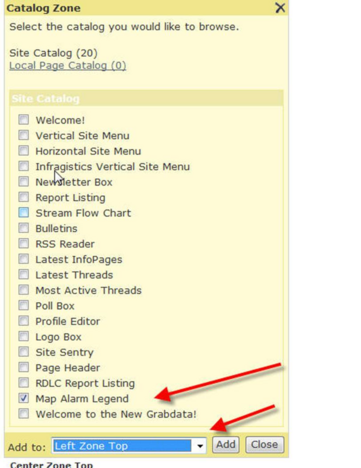
Follow the same procedure for the page header. This time, click the checkbox for ‘Page Header’ and select ‘Center Zone Top’ from the drop-down box. Click on ‘Add’ to lock in the changes.
The web parts that are added have a default setting ‘Chrome Type’ that needs to be deactivated for the parts to display correctly. To deactivate the Chrome type, click on the ‘Edit View” link on the top of the screen.

For each web part, click on the upper-right corner of the object and select “edit”. On some web forms, the size of the form distorts the menu box, as shown below:
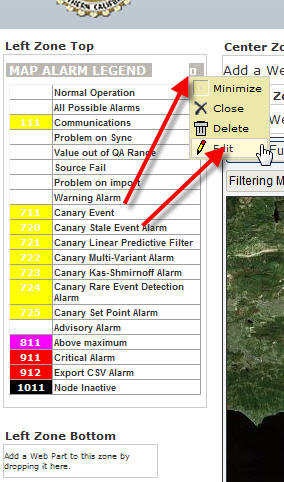
After you select “edit”, an editor zone box will appear. In the “Chrome Type” drop-down box, select none. Then scroll down to the bottom of the editor form and click on ‘Save’.
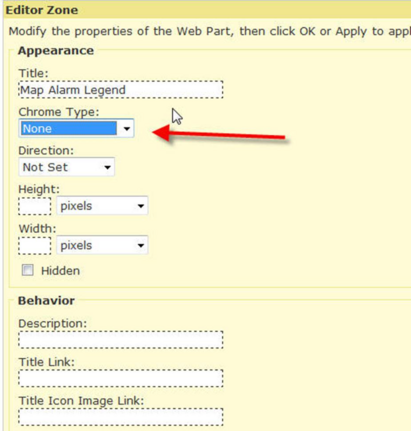
Repeat this process for the page header. At this point, the page header may appear as a red x (broken image icon). Our last step will be to define the page header image. Click on the ‘Browse View’ link to return to the default view.

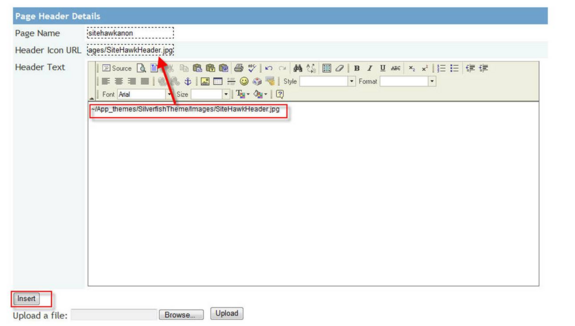
Click on the ‘Admin’ tab, then select the ‘Manage Page Headers’ link. This will enable an editor window where page headers can be specified for each page in the website. We are going to add a page header for the page ‘sitehawkanon’. In the Page Name, enter ‘sitehawkanon’.
In the Header Icon URL box, enter ‘~/App_themes/SilverfishTheme/Images/SiteHawkHeader.jpg’. Then click the ‘Insert’ button. Note: Do not enter anything into the large HTML formatting box.
The header image already exists in the WebFramework directory. Once the path is entered correctly in the box, it will display each time the anonymous web page is accessed.